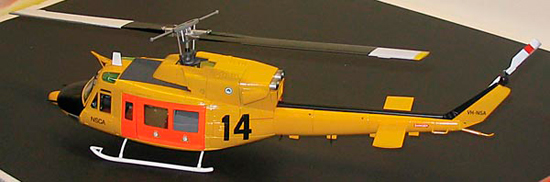
1:35 Bell 212 Model Build
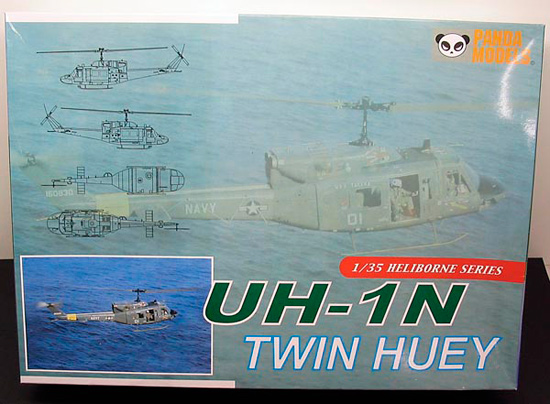
This model is based on the discontinued 1:35 Panda kit of the UH-1N military Huey twin. This may well be available again soon under the Dragon banner. They did that with the Panda UH-1D/H and included new parts and some photoetch. As I was writing this, the Panda UH-1N kit was on the Dragon website, but still under Panda branding and with no mention of PE. There are no major external differences between the military UH-1N and the civilian Model 212 so modelling this version presented no real problems.
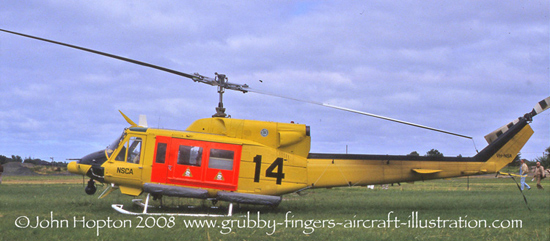
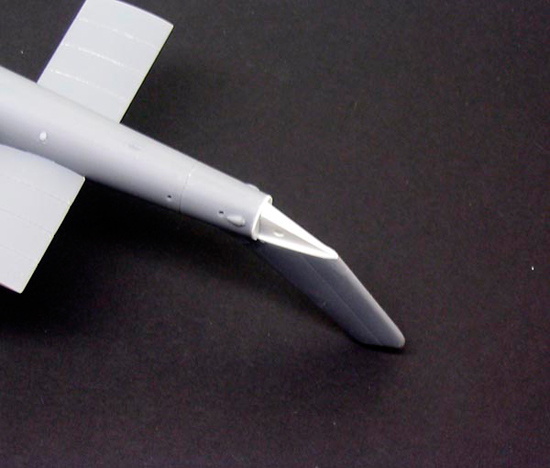
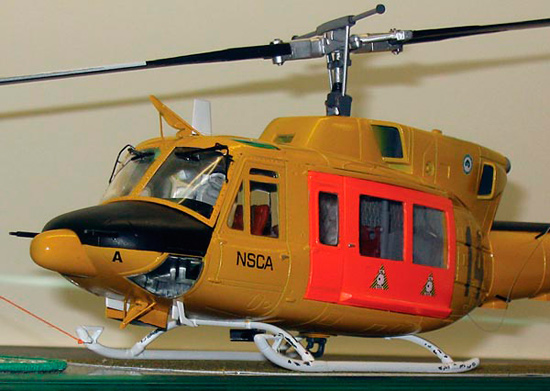
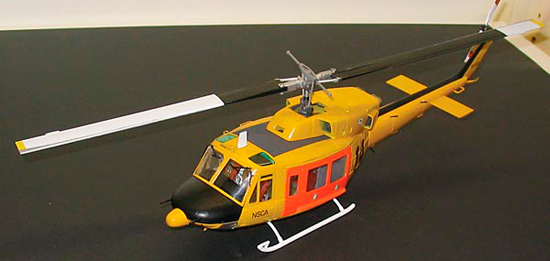
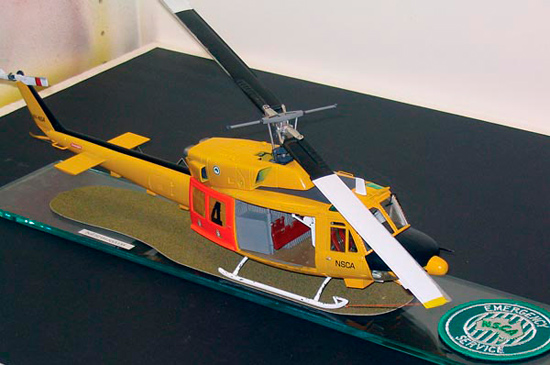
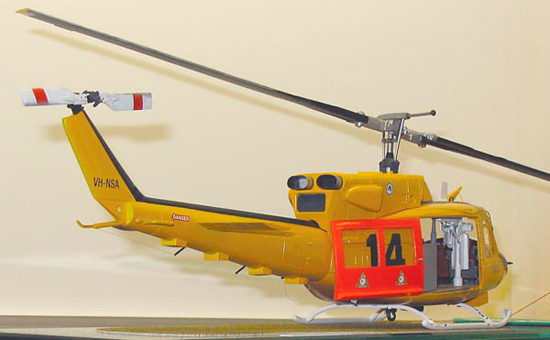
Changes required to make it into VH-NSA included modifying the end of the tail boom to depict a removed tailcone, adding various boxes and aerials underneath, a scratchbuilt rescue hoist, loudspeaker, timber floor and internal storage boxes. The tail rotor also needs to move to the starborad side of the tail fin.
Open the box…
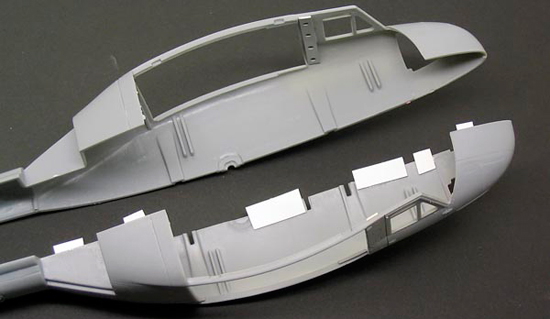
The model itself is moulded in a hard medium-grey plastic. Detail is a bit clunky with railway rivets, deep panel lines, soft detail and simplified rotor head and interior. It’s like a cross between 1970s Revell and 1980s Matchbox. The mouldings are clean and flash free with a few ejector pin marks. The kit shares two main sprues with the sister Panda UH-1H kit and has two grey sprues and the clear sprue unique to the UH-1N. Curiously, the single engine UH-1H cowlings are still included on the UH-1N fuselage sprue. The separately bagged clear sprue is nice and clear and fairly free of distortions, if a bit on the thick side. Unbeleiveably, there are location holes for the wiper blades in the middle of each windscreen!
The decals have a high gloss carrier film and I would question the colour of the red, it is very bright. The US national insignia appears incorrect too, with the red bar being very narrow. Not that it matters in this case as I had new decals made.
The instructions are clearly drawn and straightforward. The kit offers a couple of choices as far as engine covers and aerials go, so you’ll need to check your references. No armament or figures are included in the Panda version, though there are a few extra parts including a weapons pylon and rocket pod (just one), but not the fuselage attachment gear. One of the new Dragon/Panda UH-1D/Hs does include figures, the Dragon Vietnam Helicopter Crew set, and a pintle-mount M60, so any Dragon re-issue of this kit may include them too.
Sticking it together
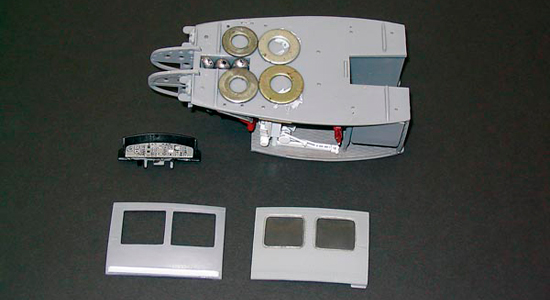
Construction starts with the cabin interior and cockpit. The seat armour plating is discarded and the seat bases cleaned up a bit. The kit seats are reasonable replicas of the originals so, apart from the armour plating, I left them as is. The integral seat belt moulding is nice and deep and paints up well.
The instrument panel consists of a decal on a flat moulded piece. I elected to replace the kit piece with a piece of plastic card cut to shape. This gives a bit better scale appearance. This is no substitute for a resin replacement, but it did the job. The new Dragon pre-painted photoetch panel would have been nice!
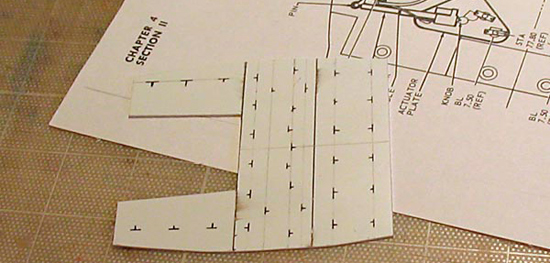
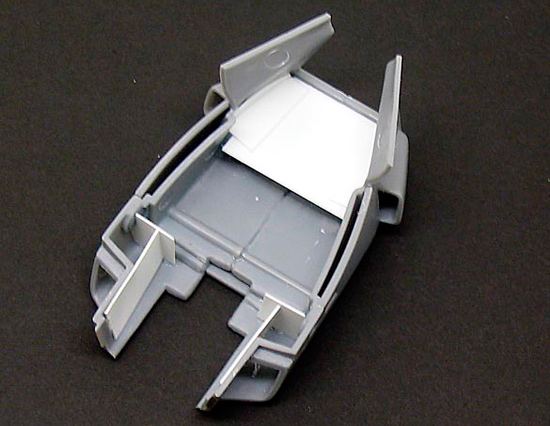
My reference photos show VH-NSA with a wooden floor covering so I added this with some thin plastic card painted up to represent ply. This panelling has a series of strategically placed holes so you can get to the tiedowns and lug holes in the floor underneath. I measured these up from a tech drawing in a Huey manual and drilled them out.
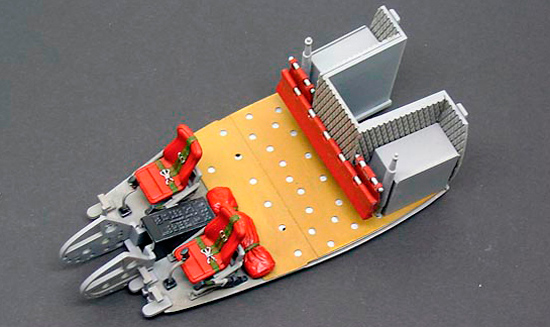
I scratchbuilt the rescue hoist out of styrene shapes and bits from the spares box. I could only find one pic of this design of hoist, so much of the shape and detail is guesswork.
I left off the seats at the rear of the main cabin and carved off their locating rails as there will be large storage boxes in their place. Most of the interior is a matt medium grey so I painted this up with some grey auto primer out of a rattle can.

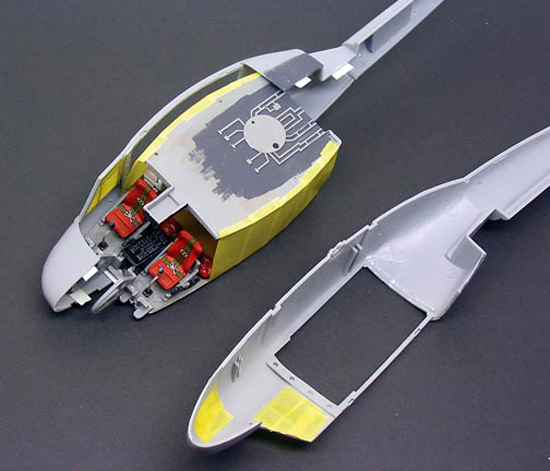
The main cabin front seats are left out too as this area is left clear for the winch and recovery operations. The forward facing rear seats are painted red and installed folded. The cabin ceiling goes on next, capturing the seat uprights and rescue hoist between.
I left the transmission assembly off until later so it didn’t get in the way. I also left off the cockpit windows as I know I can fit them once painting is complete.
The fuselage halves now go together, trapping the completed interior in place. There are a grand total of two locating pins for the entire fuselage so some squares of plastic card were added to facilitate alignment.
I glued some sinkers in the centre console and washers under the floor to keep the nose down. This gives the final model a nice deep sit on the skids, too. I like my models to have a bit of mass and not look like they are perching. They sit more convincingly on a base then too.
I tried an unorthodox masking technique for the interior. Rather than trying to mask the doorways once the fuselage was was complete, I covered the sides of the completed interior with Tamiya tape with the intention of pulling it out the doors once exterior painting was completed. This has the added advantage of protecting the interior from sanding dust etc. I ran masking tape over the inside of the cockpit windows to achieve the same results.The fuselage took quite a bit of aligning and clamping and nudging and squeezing to get it to line up as well as possible and I glued it together in stages. I found If I trimmed off the location rails for the rear of the interior I got a better fit. Check and test, check and test, check and test. The join was adequate, but nowhere near perfect. It took quite a bit of filling and sanding and I still couldn’t completely eliminate the join.
Once the fuselage assembly is set solid, I attacked the end of the boom to remove the fairing. I cut through the boom at the last panel line and scribed through at the base of the fin. I blanked off the end of the boom with some plastic card. I fabricated a wedge shaped box with access holes for the lower fin extension and attached it in place.
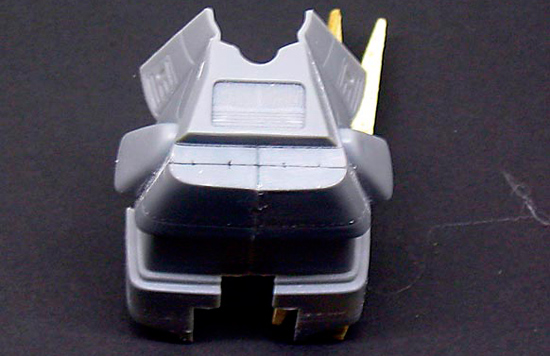
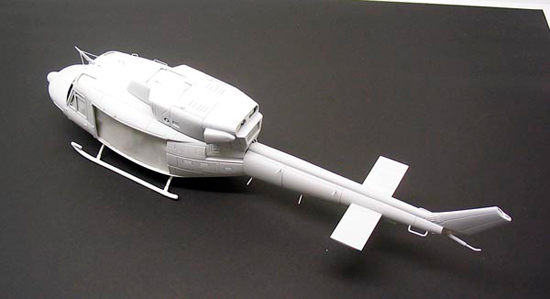
The roof panel then went on. This was a better fit than the fuselage halves and only needed minor clamping. The top edges of the main door frames tend to sag away from the roof panel, so I propped these up with lengths of toothpick to make sure the frame seated securely against the underside of the roof. Note that the roof scoops don’t appear on any of the 212 references I looked at, so these were left off and the location mouldings sanded off.
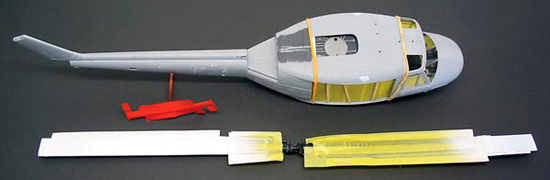
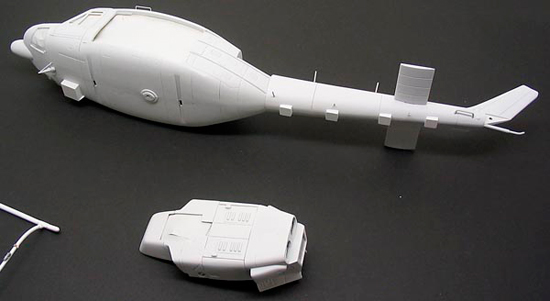
The engine nacelle goes together next. This has some serious see-through issues so I blanked off the two sets of intakes.
I felt the exhaust was a bit clumsy so I cut off the kit jet pipes and drilled out the holes.

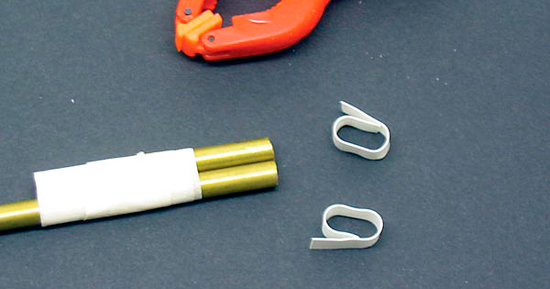
I fabricated some new jet pipes by wrapping thin plastic card strips around a couple of pieces of brass rod and immersing the lot in boiling water.
The engine nacelle itself goes together well and fits to the roof well enough to paint it separately and attach later. If I was doing this again, though, I would remove the fuselage side panels from the nacelle parts and glue them in place first. This would eliminate what fit issues there were. There is a choice of side panels for the nacelles, solid and ventilated. VH-NSA had the solid ones.
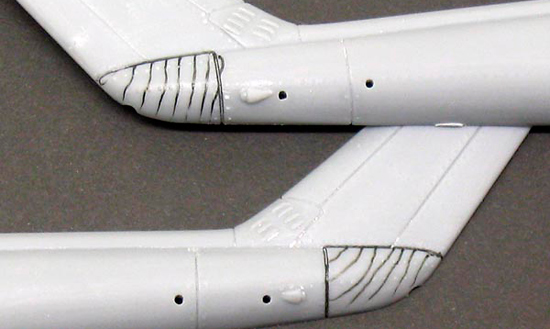
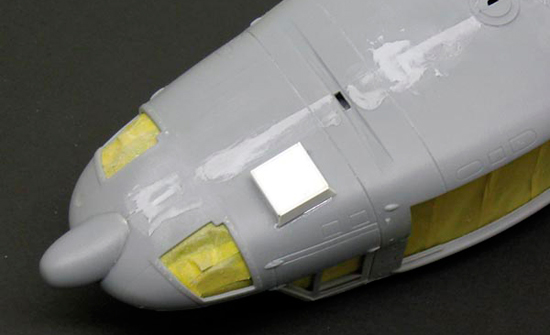
The tailplanes need the inside edges trimmed so they sit perpendicular to the centreline, rather than perpendicular to the boom skin. These were attached and the whole fuselage was cleaned up for painting. The baggage compartment door is an awful fit and took the most cleaning up, sanding and filling of the whole kit. I removed all of the rivets on the fuselage and bodywork. A study of photos shows that they are barely visible on the pristine NSCA choppers. I have also seen photos of this model completed and weathered and the rivets make this 1:35 model look like 1:72 scale!
The curious box under the chin was scratchbuilt and fitted now as well as the box shapes under the boom, the aerial struts, the tail skid, fuse-wire grab handles and cable cutters. I have been told this box may have something to do with the sophisticated 4-axis autopilot fitted to this machine. I'll ask you to ignore the fact that I have very carefully fitted this to the wrong side of the aircraft! Grubby fingers strikes again.
A splash of colour
The whole lot was then primed with matt white undercoat from a rattle can. I prefer using spray cans for white and yellow top coats, rather than airbrushing, as the spray can paint tends to be particularly opaque and covers well. I am also not much good at airbrushing gloss, matt is much more forgiving!
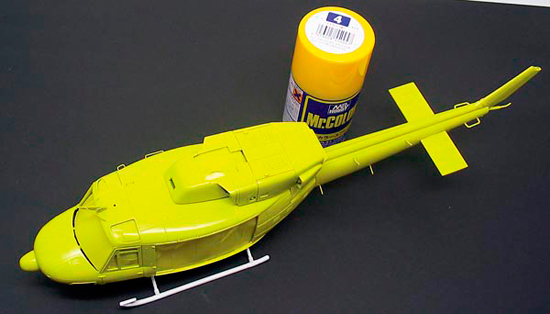
ere is a cautionary tale: Mr Hobby Colour spray can caps and the paint contained within the can don’t necessarily match! I bought a nice chrome yellow-capped can, but what came out was a decidedly lemon/lime hue. I persisted with it thinking that a few coats and some curing time may darken it up. Nope. Oh well. Off to the shops to find some Tamiya yellow.
This paint DID match the cap! The end result is a more appropriate colour, but a rather thick paint job.
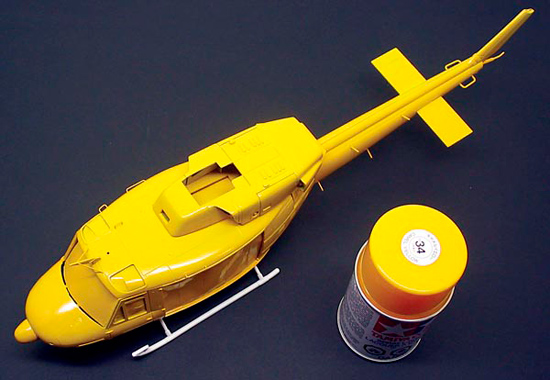
The scheme is a simple overall chromium yellow with black trim. When dry, the tail and nose anti-dazzle panel was masked and painted satin black. The walkway on the roof was masked and painted a matt dark grey.
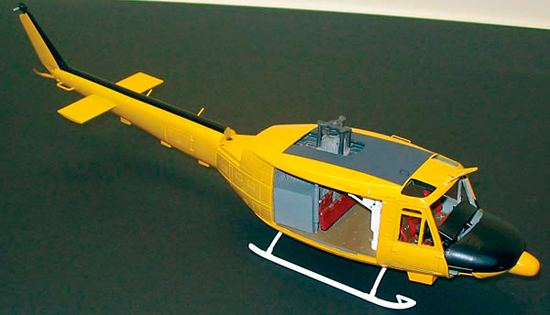
The doors are next on the list. The kit is designed so you can slide the side doors open. The trade-off is that they won’t open completely and the operation is clumsy and, really, a bit of a gimmick. I trimmed off the sliding parts and glued one each in the open and closed positions. There is a particular style of side door used on some civilian 205s, 212s and 412s that includes escape panels. These are identifiable by the rectangular outline on the doors and the squared-off window corners. Apparently they came about as a result of a couple of Huey prangs in Canada where the chopper ended up on it’s side. The survivors had trouble getting the eight feet up to the door and getting it open. The window openings were simply filed square and clear sheet cut to shape. VH-NSA also had a ridge running along the bottom of the door, the purpose of which I do not know, possibly strengthening as it now has two removeable panels. I replicated this by sanding square secton plastic rod to a triangular profile and glueing and clamping it to the door. The doors were sprayed medium grey on the inside and matt white followed by fluorescent orange on the exterior.
Markings
I created decal artwork on the computer and got Mary at Brunel Hobbies to run them off on their Alps machine. They were beautifully thin, in register, nicely opaque and settled down well with some Mr Mark Softer, even into the deep recess of the door rails.
Finishing Off
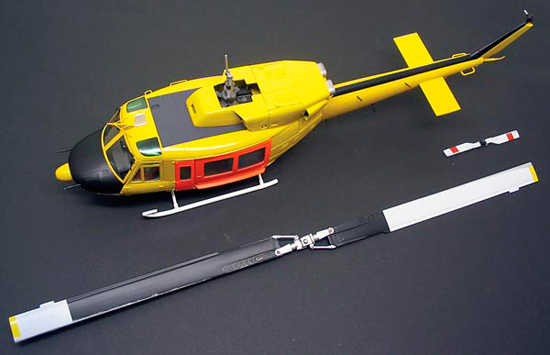
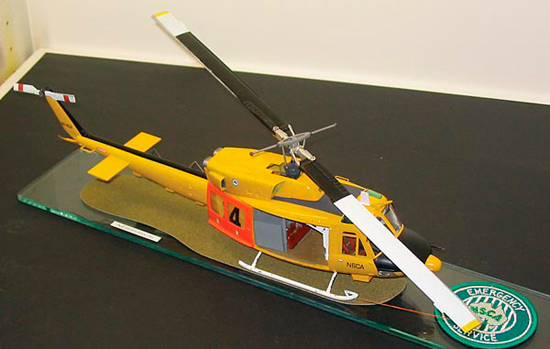
The main rotors were assembled as per the instructions and painted up. The kit has the correct wide-chord blades for the UH-1N and 212. These same blades are supplied in the UH-1D/H kit but are not correct for that model. The tail rotor received the same treatment. Note that the kit instructions say to mount this on the port side of the tail. UH-1Ns and 212s all have it mounted to starboard, so a little rearrangement was called for. The balance of the aerials, antennae and bits and pieces went on next. The windscreen frames were painted and then the windscreen installed. This was a bit of a tricky fit. I added off quite a bit of the underside of the lower frame, but I still ended up with a gap.
Wear and tear
The NSCA was an extremely dedicated and professional organisation using many ex-service personnel. This was reflected in the condition of their equipment. The only wear and tear evident on images of VH-NSA was abrasion on the leading edges of the rotors and some paint chipping on the skids. I kept the weathering to a minimum to best reflect this.

Washing up
This build took quite a long time, over 60 hours in all, certainly more than I anticipated, and at times it was a struggle. A lot of this time was the little bits of scratchbuilding, which all add up. I can’t say the kit is up to par as far as detail and fit is concerned. Even so, the finished model looks and smells like a Huey, and isn’t that what it’s all about?
Acknowledgements
Thanks to John Hopton, Mike Robertson and Darren Mottram for their reference shots and permission to use them in this article. Thanks also to Mary at Brunel Hobbies for doing such a great job on the decals at such short notice.
Go to Scale Modelling from Bell 212 Build
