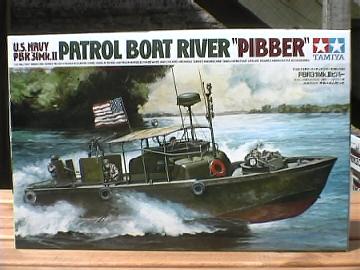
1:35 PBR Pibber Patrol Boat
"PBR Streetgang"
Model Build
This page was last updated 17 January 2013
The Motivation
I was recently looking at the pile of modelling projects I have half completed and I had a minor epiphany. I realised that I have all these wonderful ideas and I see so much potential in an unbuilt kit that I get a bit carried away. I keep thinking about what I could turn it into. I start out with the best intentions, but usually lose interest or some other great idea springs up and I run off with that. Consequently, I only got around one model actually finished each year.
I've decided to change that, at least for a while, and do some kit-assembling, rather than monster-creating!
An ideal opportunity came up recently when I won the monthly model club raffle. In the selection of prizes was the Tamiya Pibber patrol boat. With Apocalypse Now being high on my favourite films list, the Pibber is a kit I have wanted to model since it came out. Snaffled!
The following is the result.
The Kit
The Tamiya PBR kit is was a significant cross-over kit on its release. Like the spate of 1:35 helos that started coming out around the same time, it provided the armour modeller with a different subject in a compatible scale. It also provided the ship modeller with an opportunity to try something in a larger scale, without taking over the display case!
Basic Construction

I wanted to build this model as close to OOB as I could. Of course, I couldn't, and did add just a couple of minor things. I also wanted to tackle some figures. I always like the life a figure or two brings to a displayed model, but I've always been scared of giving it a go.
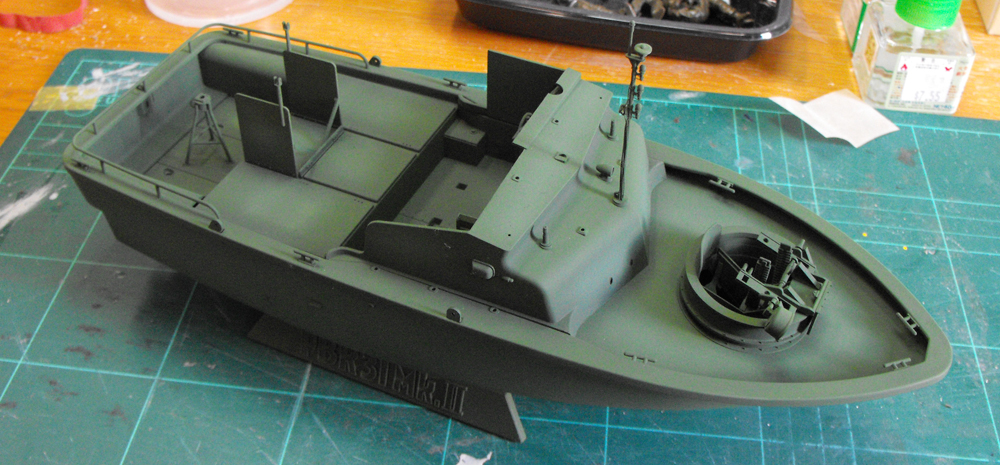
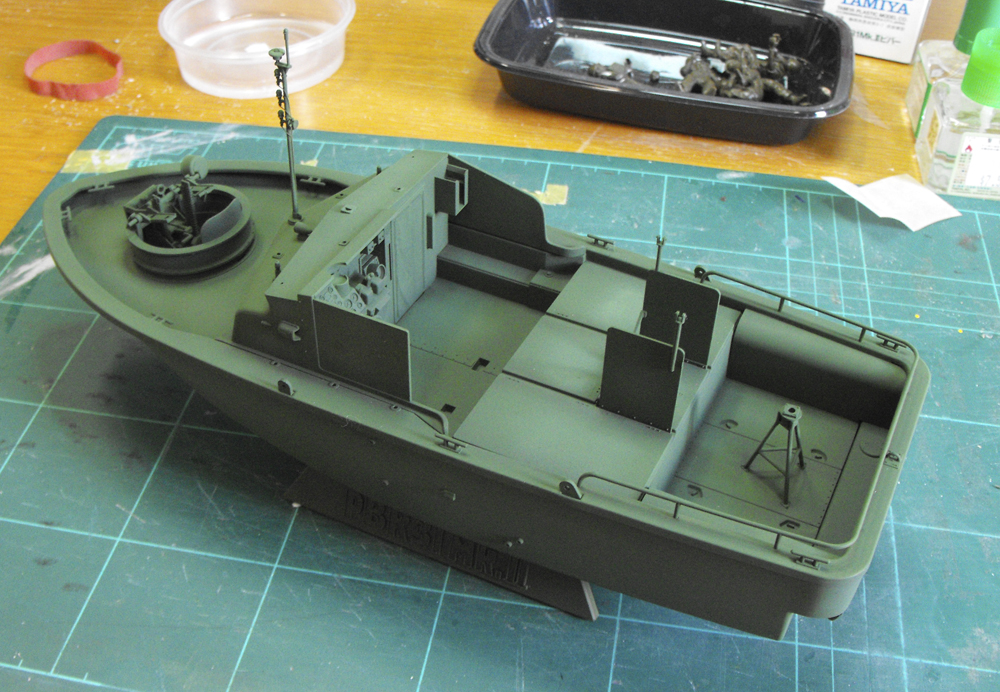
The model itself is relatively simple, but, nevertheless, superbly engineered. I had to remind myself that this kit is coming up to 20 years old. Tamiya really have been doing it this well for that long. The kit pretty much made itself. There was some mould break seams to clean up and a few shallow ejector pin marks to scrape off. Apart from that, the kit was as clean as a whistle.
The above pic shows the major subassembly construction done.
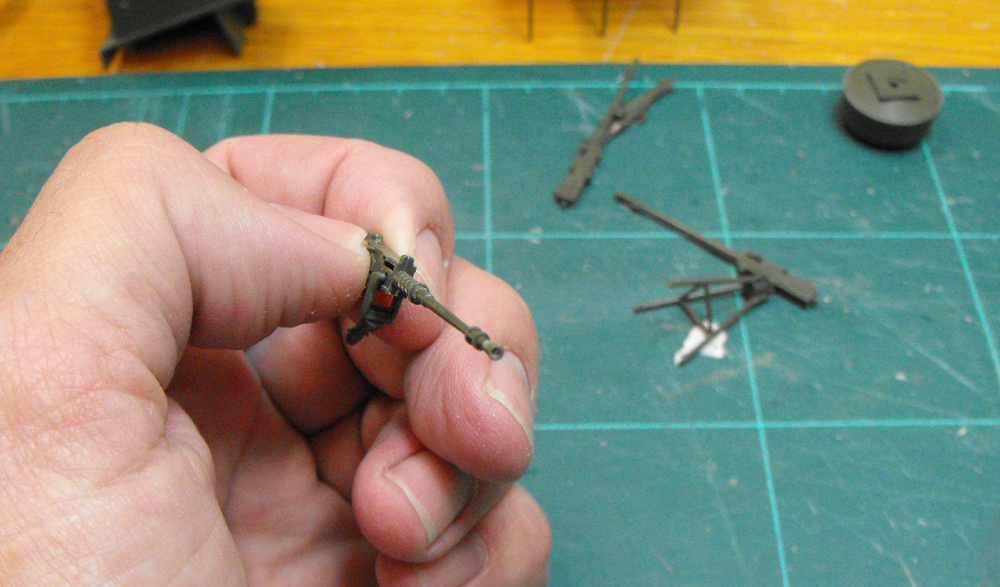 The barrels of the .50 Cals were drilled out for a bit of extra realism.
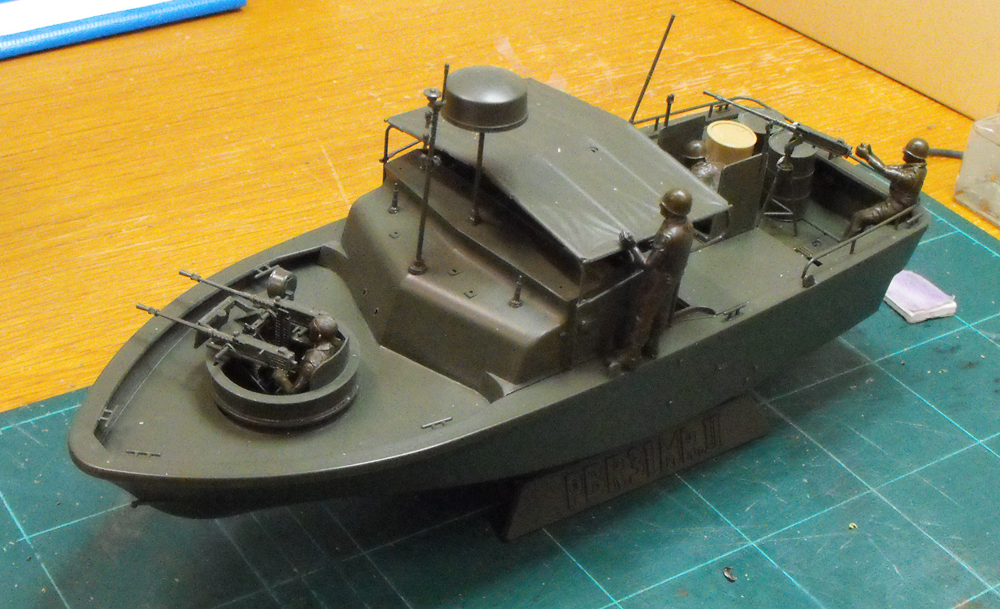 Here's a dry run of the major subassemblies. There's really not much of a story to tell about the build so far, the pieces all fitted very well. I did glue the deck to the hull in stages and used a fair amount of clamping to make sure they fitted securely and I ended up with a good solid bond.
This the first time I have included figures in a build, so it'll be an interesting project from my point of view for that alone.
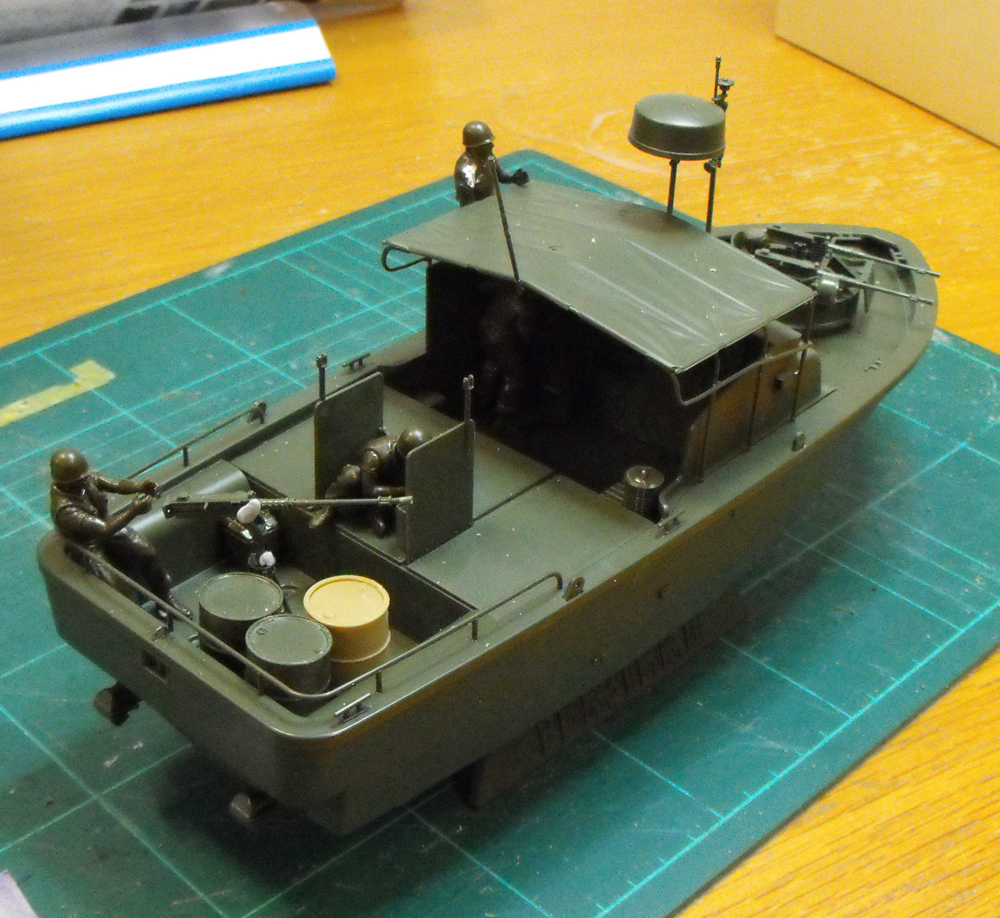
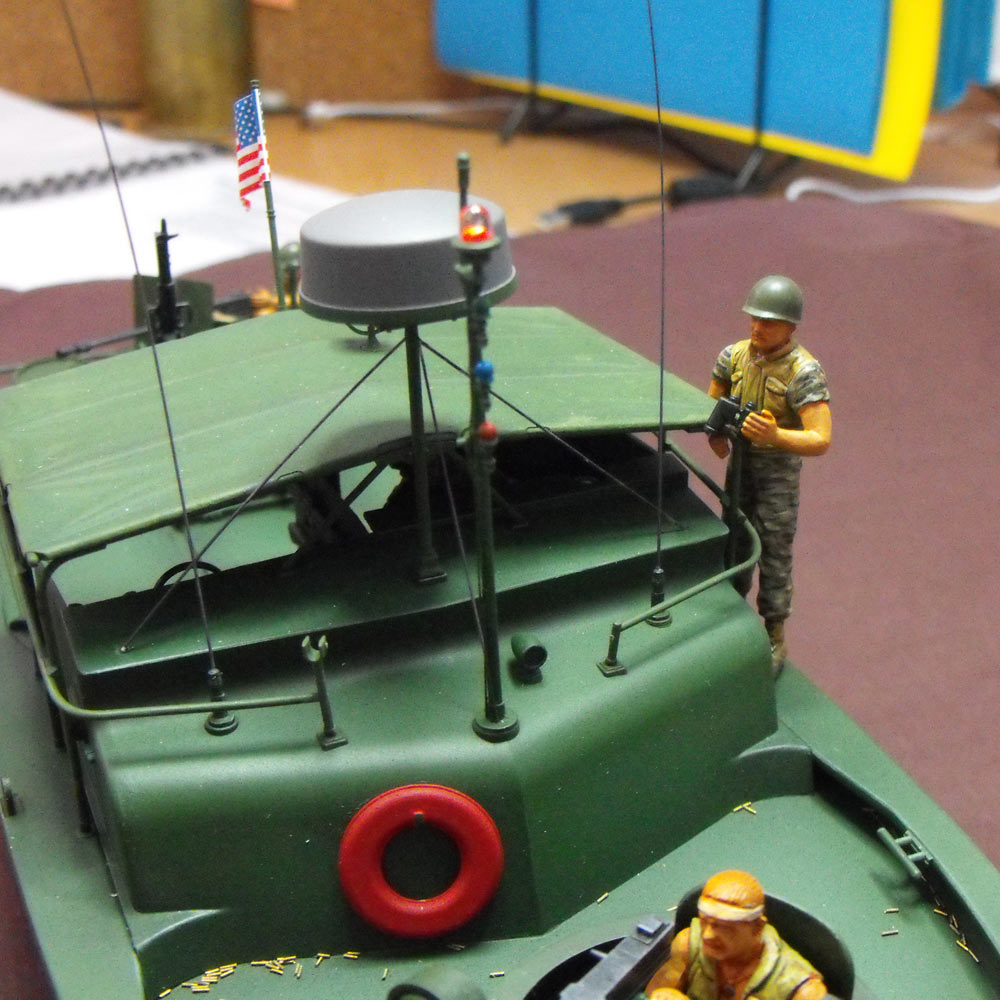
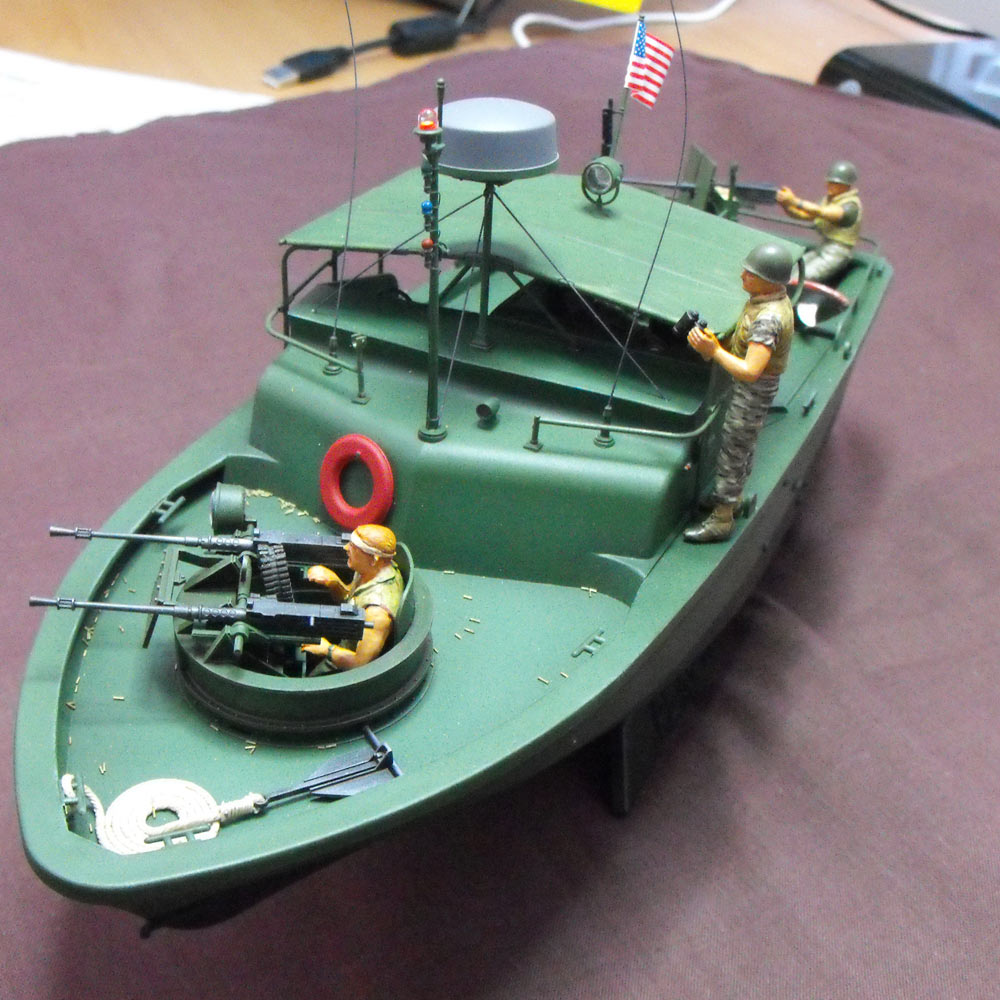
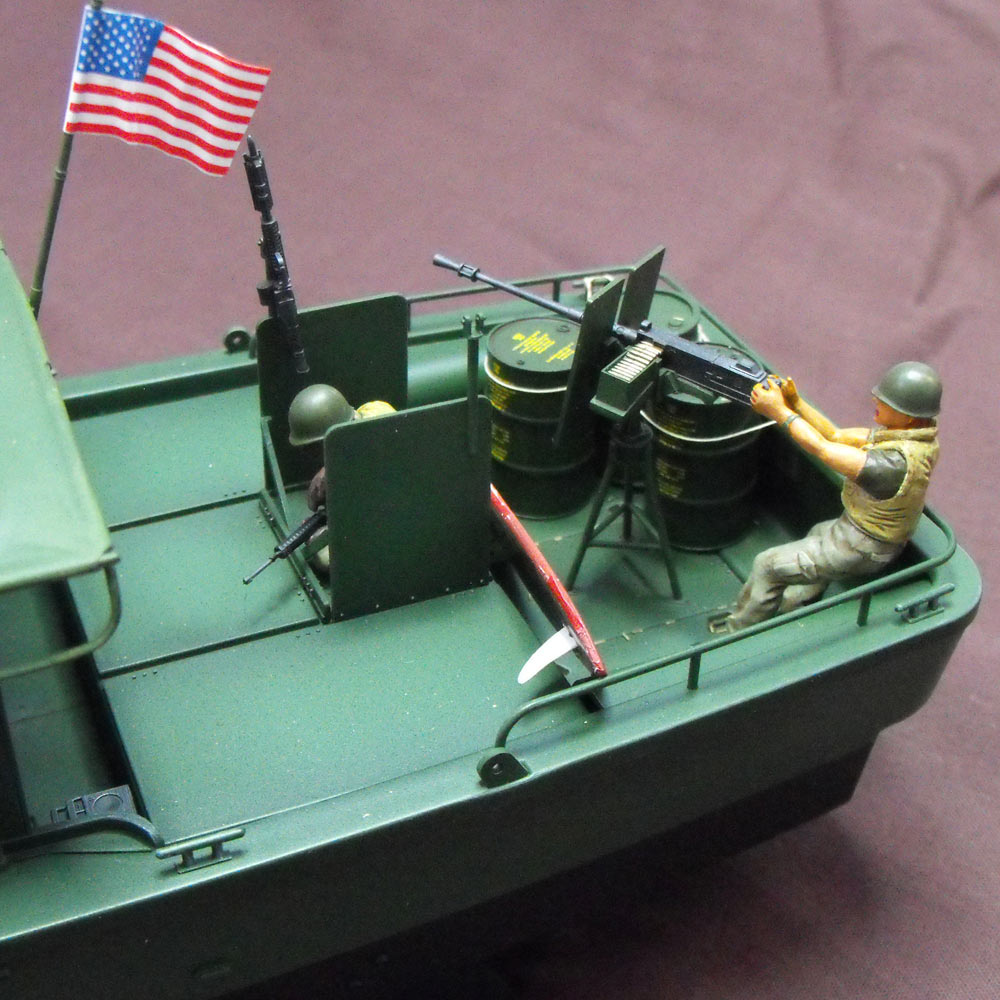
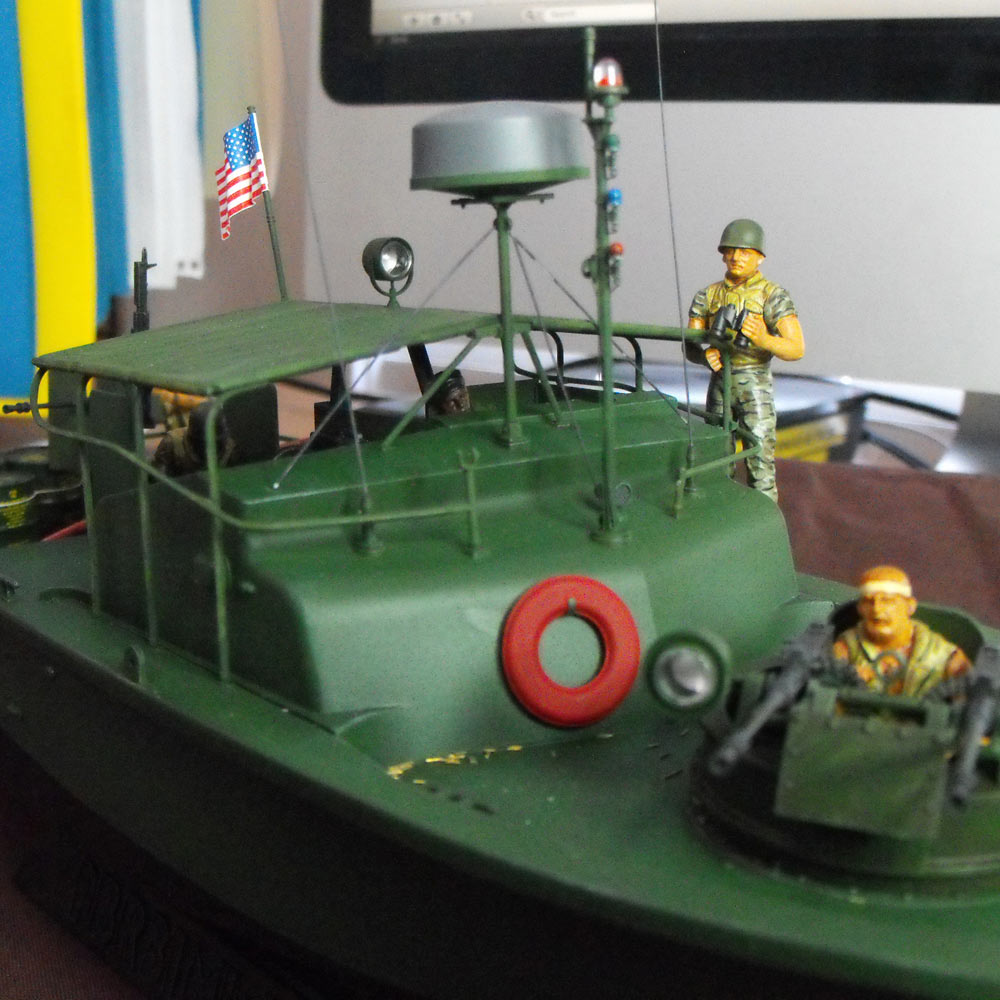
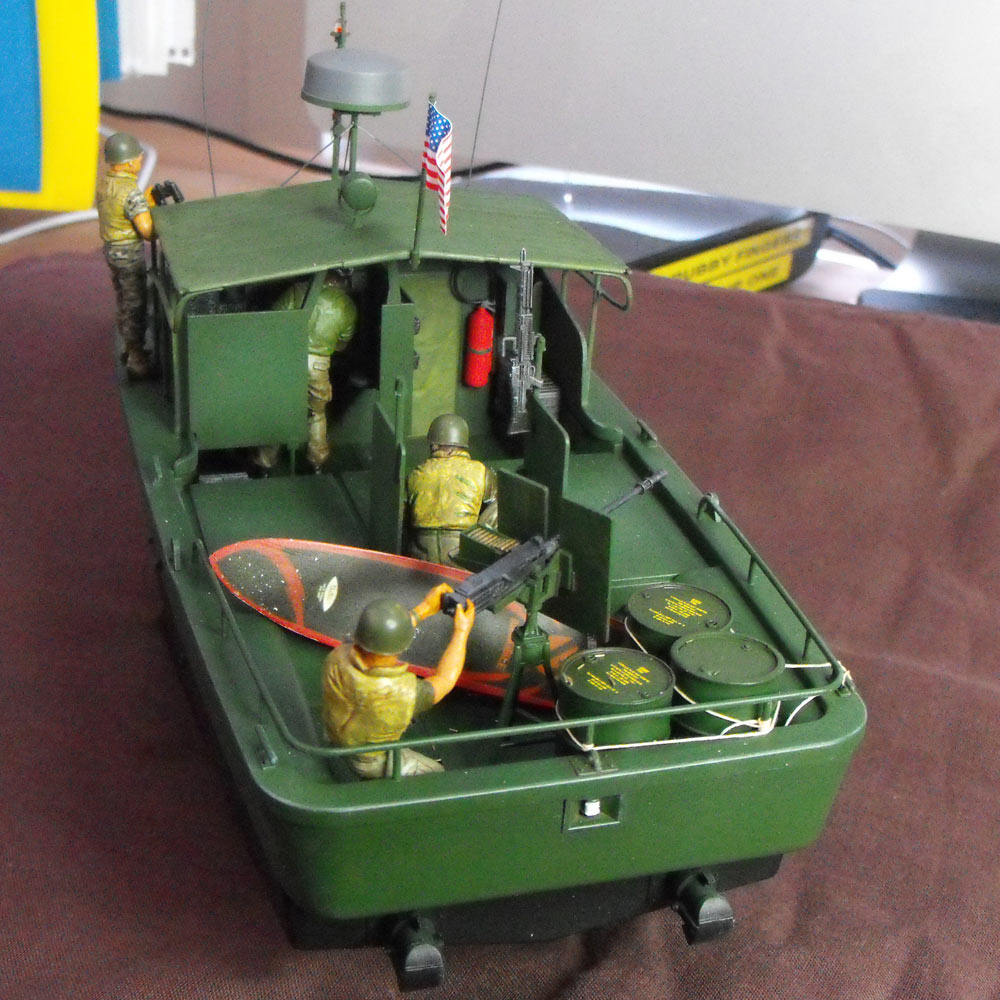
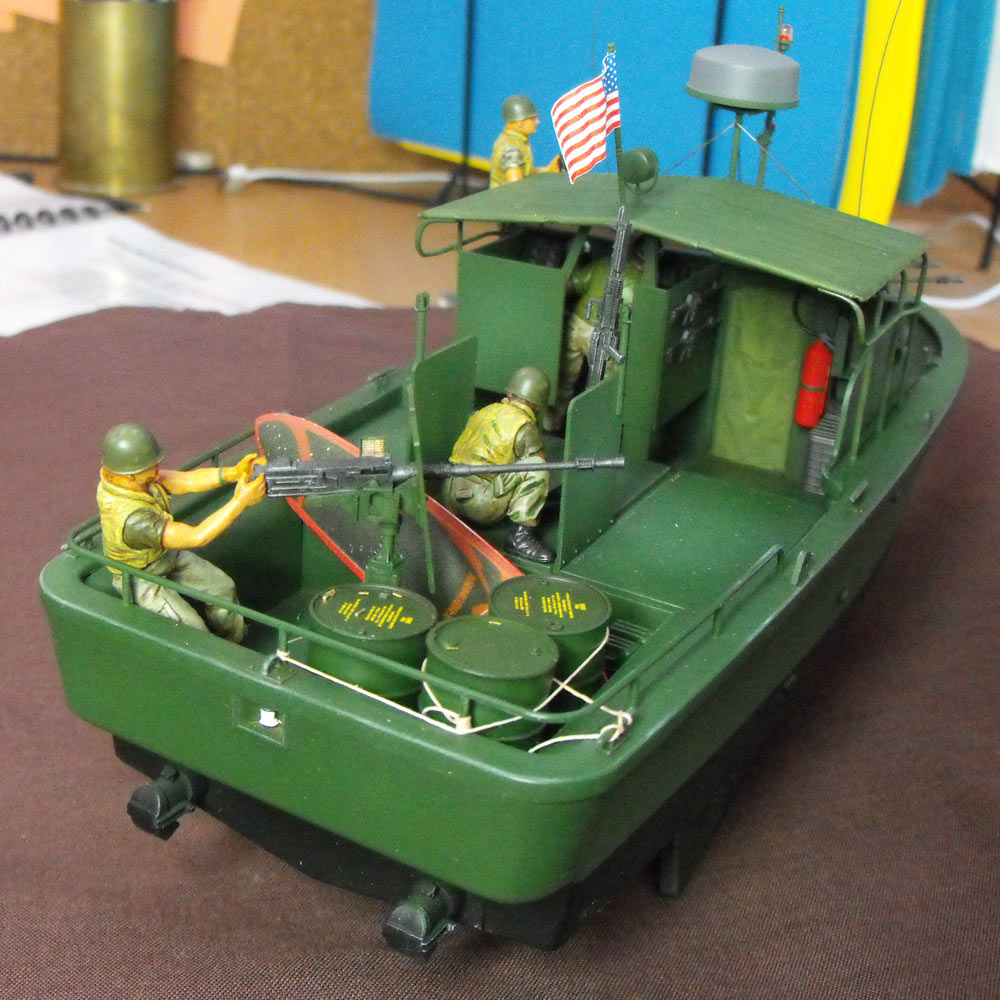
Seeing as I wanted to base my model on the PBR from Apocalypse Now and I didn't want to change the kit much, I opted to model the boat as it was early in the film, before it got burned, shot-up and blood-stained. The only variations from the supplied kit are the addition of an extra fuel drum in the rear, the surf board stolen from Killgore and an extra figure made up from the spares box to represent Martin Sheen's character, Captain Willard.
Charlie don't surf
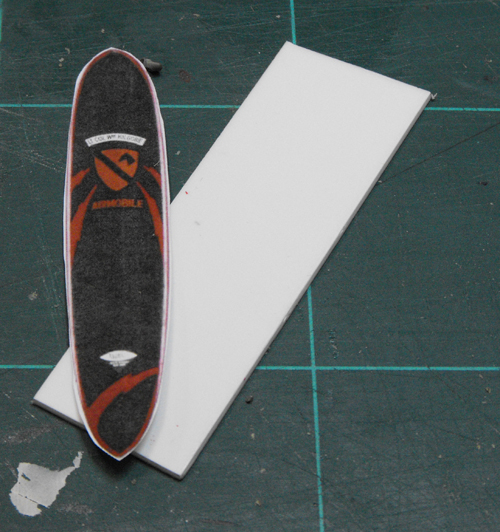
The surfboard started life as a chunk of 1mm plastic card.
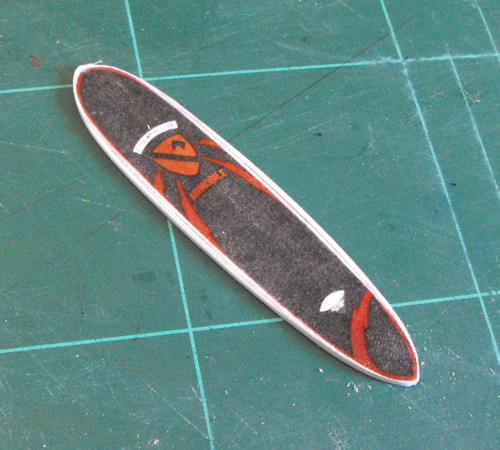
A laser print was run out to size and glued to the card to get the shape right.
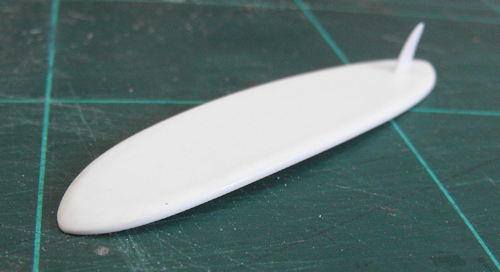
The board was then sanded to shape and a fin added from thin card.
Painting
Most of the subassemblies were added to the hull and the whole thing painted. I used Tamiya Olive Green as the base and then post shaded with a mix of Olive Green and black. A mix of Olive Green, yellow and white was then sprayed in the centres of all areas to add some fading, depth and interest.
 I have found thinning Tamiya acrylics with methylated spirits works very well and gives a super flat finish. I did also find out, though, that metho doesn't work well with Citadel (Games Workshop) acrylics. It actually "curdles" them (at least the matt white) and spits chunks out of the airbrush. Not so good!
Figures
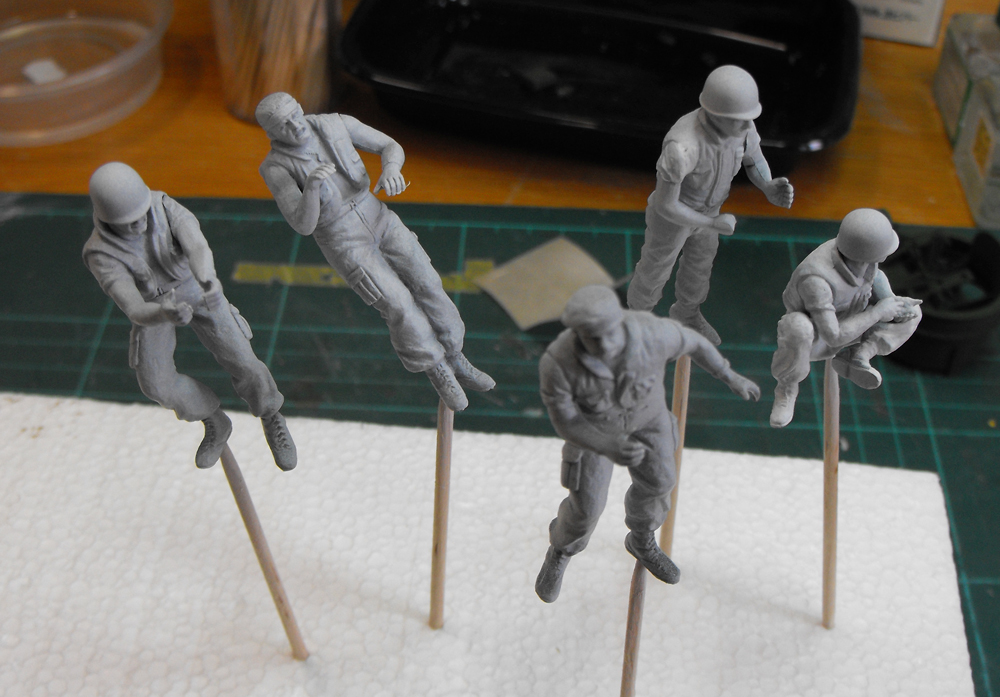 The assembled figures were given a couple of thin coats of matt white as an undercoat.
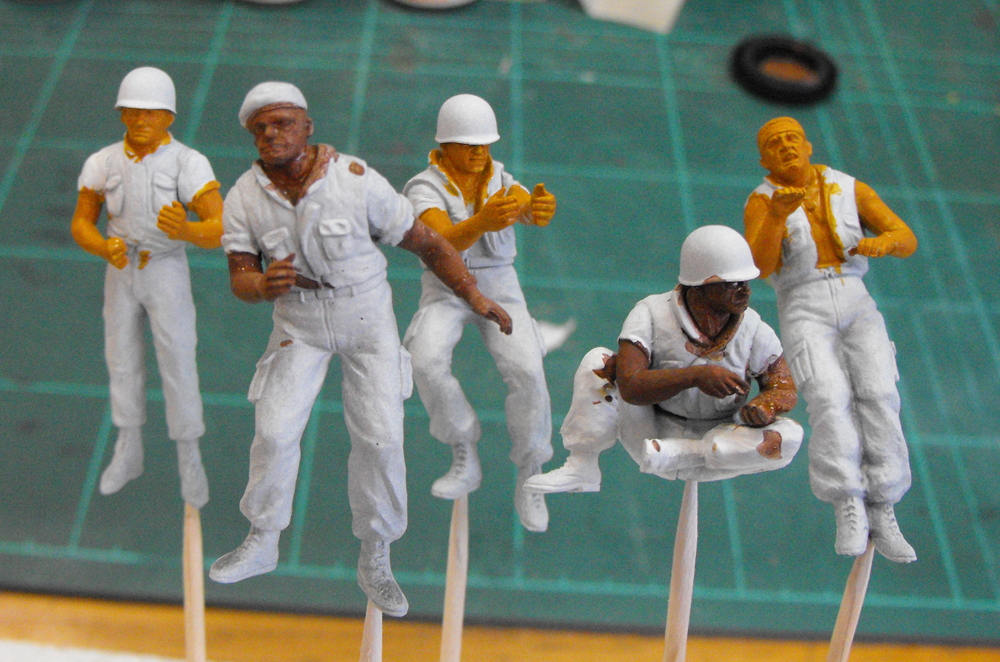 As these are my first figures, I'm using a simple method described in an early (No 37) Tamiya modelling mag. This calls for starting the flesh with an orangish mix. I used Tamiya Red Brown straight out of the bottle for the dark skinned crew members. Bear in mind here that I am making no attempt to modify the figures to represent the movie cast. For example, a young and skinny Lawrence Fishburne played Mr Clean, the corresponding figure in the kit is the beefy seated figure! It is way beyond my skills to start modifying figures so I'm only taking it as far as changing the skin tones. Interestingly, two of the kit figures do bear a resemblance to the movie cast, the skipper and the front gunner, but the others are far removed.
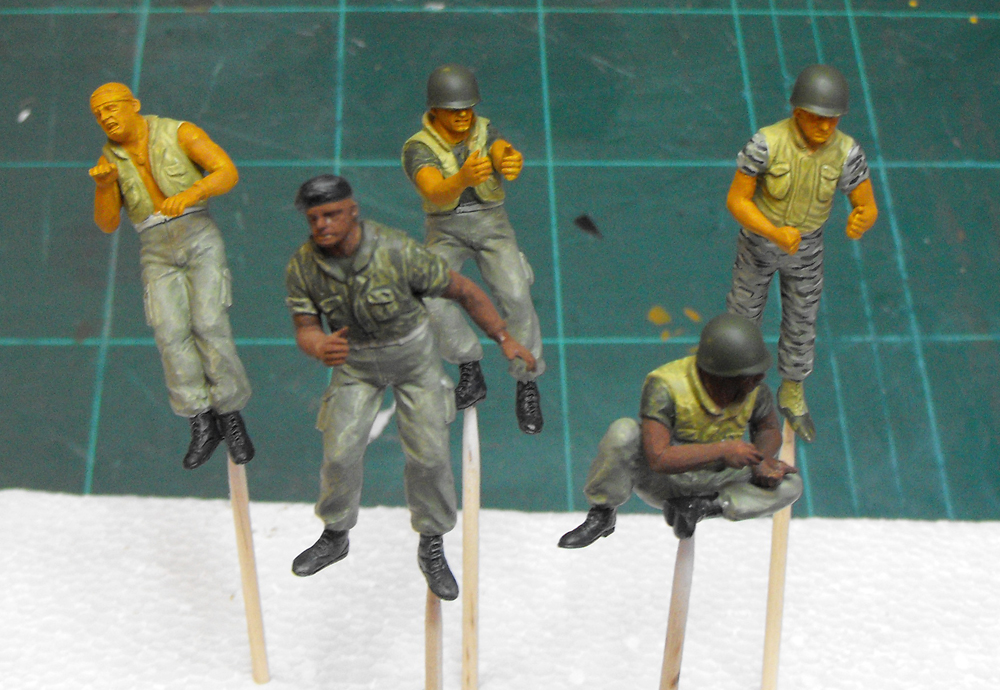 Using stills from the movie I am roughly representing the clothes worn by the crew, dark tee shirts, lighter shirts and pale flak vests with Willard in Tigercam and jungle boots.
Now, I'm not sure what happened here, but it seems I finished the build without taking any further in-progress shots! Actually, I'm sure iI took some, but I seem to have deleted them. Anyway, here are some shots of the completed build.
The figures were finished off. For a first effort I'm quite happy with the result. They're not so bad that they detract from the model. I've got the Italeri 80' Elco waiting in the wings, so I'll be getting a whole lot more practice with figures!
The surfboard was tucked into the rear compartment, as per the movie.
The drums were tied down with linen thread and tied off with clove hitch knots: "the modeller's friend", and then dabbed with PVA glue so they'd hold. The thread was weathered with some stained turps out of the brush-cleaning jar.
The brass casings are 2mm lengths of brass wire cut from some electrical wiring and sprinkled around in appropriate spots. They're not glued down, so they tend to congregate in the corners.
The coiled rope was formed by winding a length of cord on top of a shallow puddle of PVA glue. This let the edges stick together without glue sloshing up on top and making it shiny (I took pics of all this!!! Where are they???)
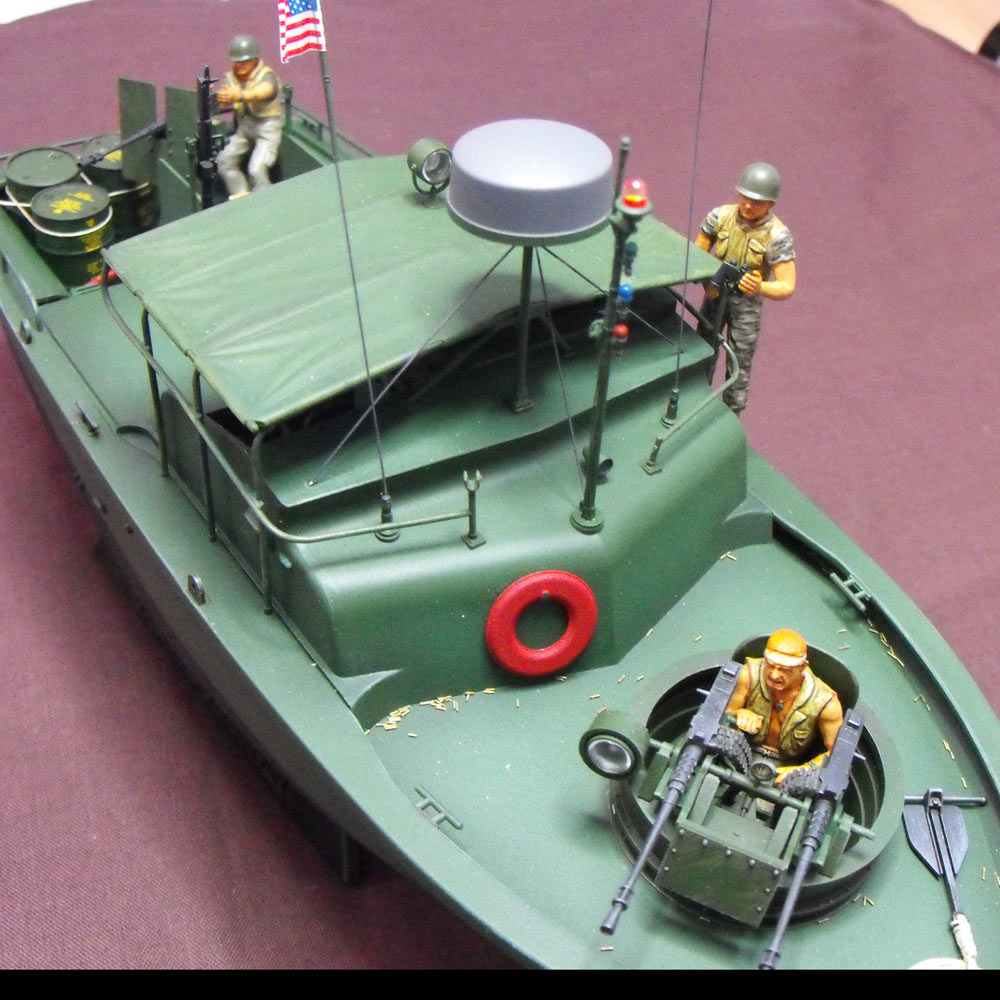
The reflector in both lamps is a disc of Milo lid foil simply pushed into the dish of the lamp.
I thoroughly enjoyed this build and I can recommend the kit as a typically easy Tamiya build.
I did notice this model on the Tamiya distributor's stand at the recent Toy and Hobby trade fair here in Melbourne, so it looks like it's available again. Graeme.
